Saturday, October 23, 2010

Days 75 - 77 Windows! Part 1

The windows were on order for a few days while the HVAC, plumbers and electricians finished up their work. We had already bought some windows at the auction and those were sitting in the garage, so Hyo and the crew put a lot of those in while we were waiting for the ones from Pella and Alside.


Main living room window. This was the big bargain from the auction. Retail, this window would run around $2000. I got it for $250. Of course, Erik and I had to haul the incredibly heavy thing back to the house, but for the price, it is hard to complain.


Here is a view out the back of the house through the window. This photo makes the yard seem a lot smaller than it looks in person, but this gives you a good idea on how large a window this is and how big a view it will give us.


Window from the side.


They removed the cracked walkway all the way back to the garage at our request. We don't really know what we are going to do with the back yard at this point, but are going with the "clean slate" approach. It will be graded and sodded. We can improve on it when we have time and budget to focus on it.

This is the ledger board for the deck. I thought it was a lot easier for building the deck to have pros put on the piece that everything else is tied to and based on (for level and size).

Because of the grading and the height that we set the windows (low enough to fit trim over top of them inside), Hyo had to put in these wells. They are actually pretty nice to allow for really good drainage and let the maximum of light in.

Here is the nearly finished stairway down to the basement unit. Window in and the trim board around the base of the house going up above it.


They completely removed the old subfloor from the old kitchen. Like a lot of things in the house, it had been redone several times. Much better to go down to the very base and start over.

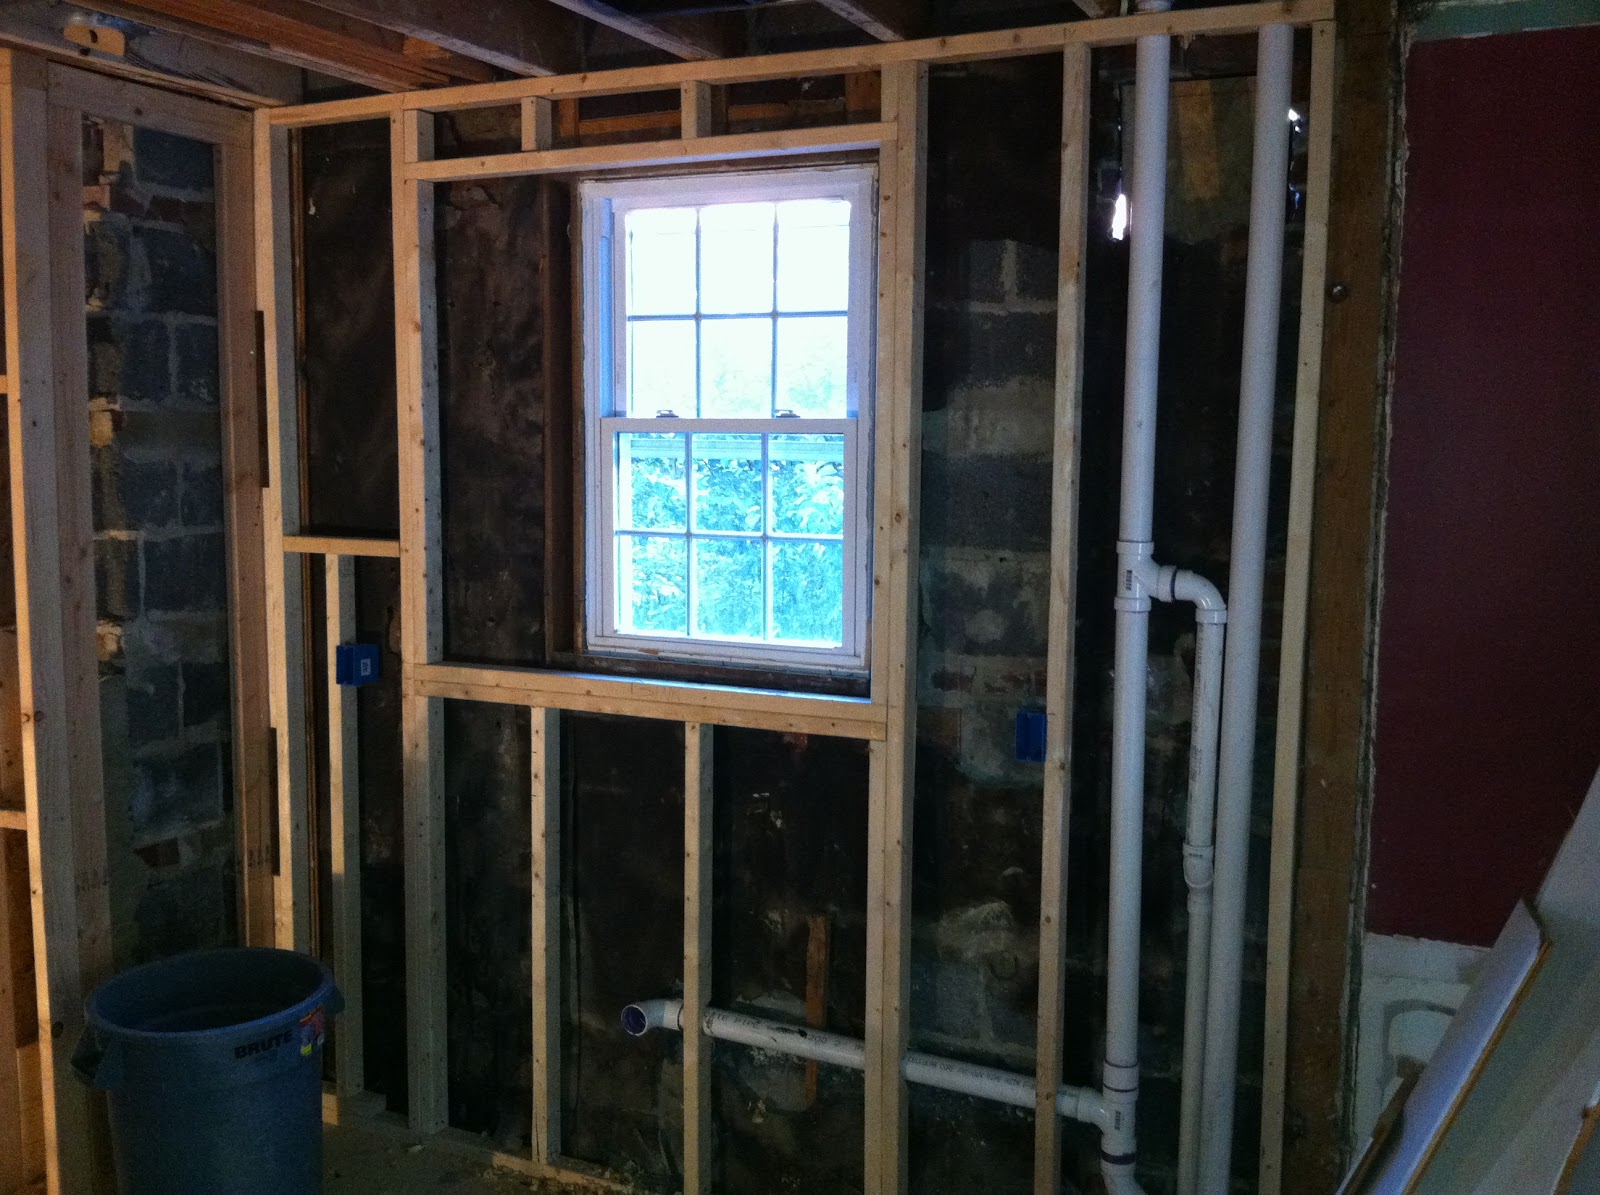
Into the basement now. This is the window over the toilet in the basement bathroom. It is taller and narrower than the others and is set very near the outside wall to allow for a nice ledge for storage.

Basement bedroom. The window on the right is the code-required "egress" window. You may remember the big well that had to be dug earlier to accommodate this window. It is large by above ground standards - you have to be able to climb out of it easily.

Here is the outside window well. The mason took the extra time to put a really nice brick cap on the top of the well wall. This is not a high traffic area by any means, but it is nice to know that the mason cares enough to add this detail.


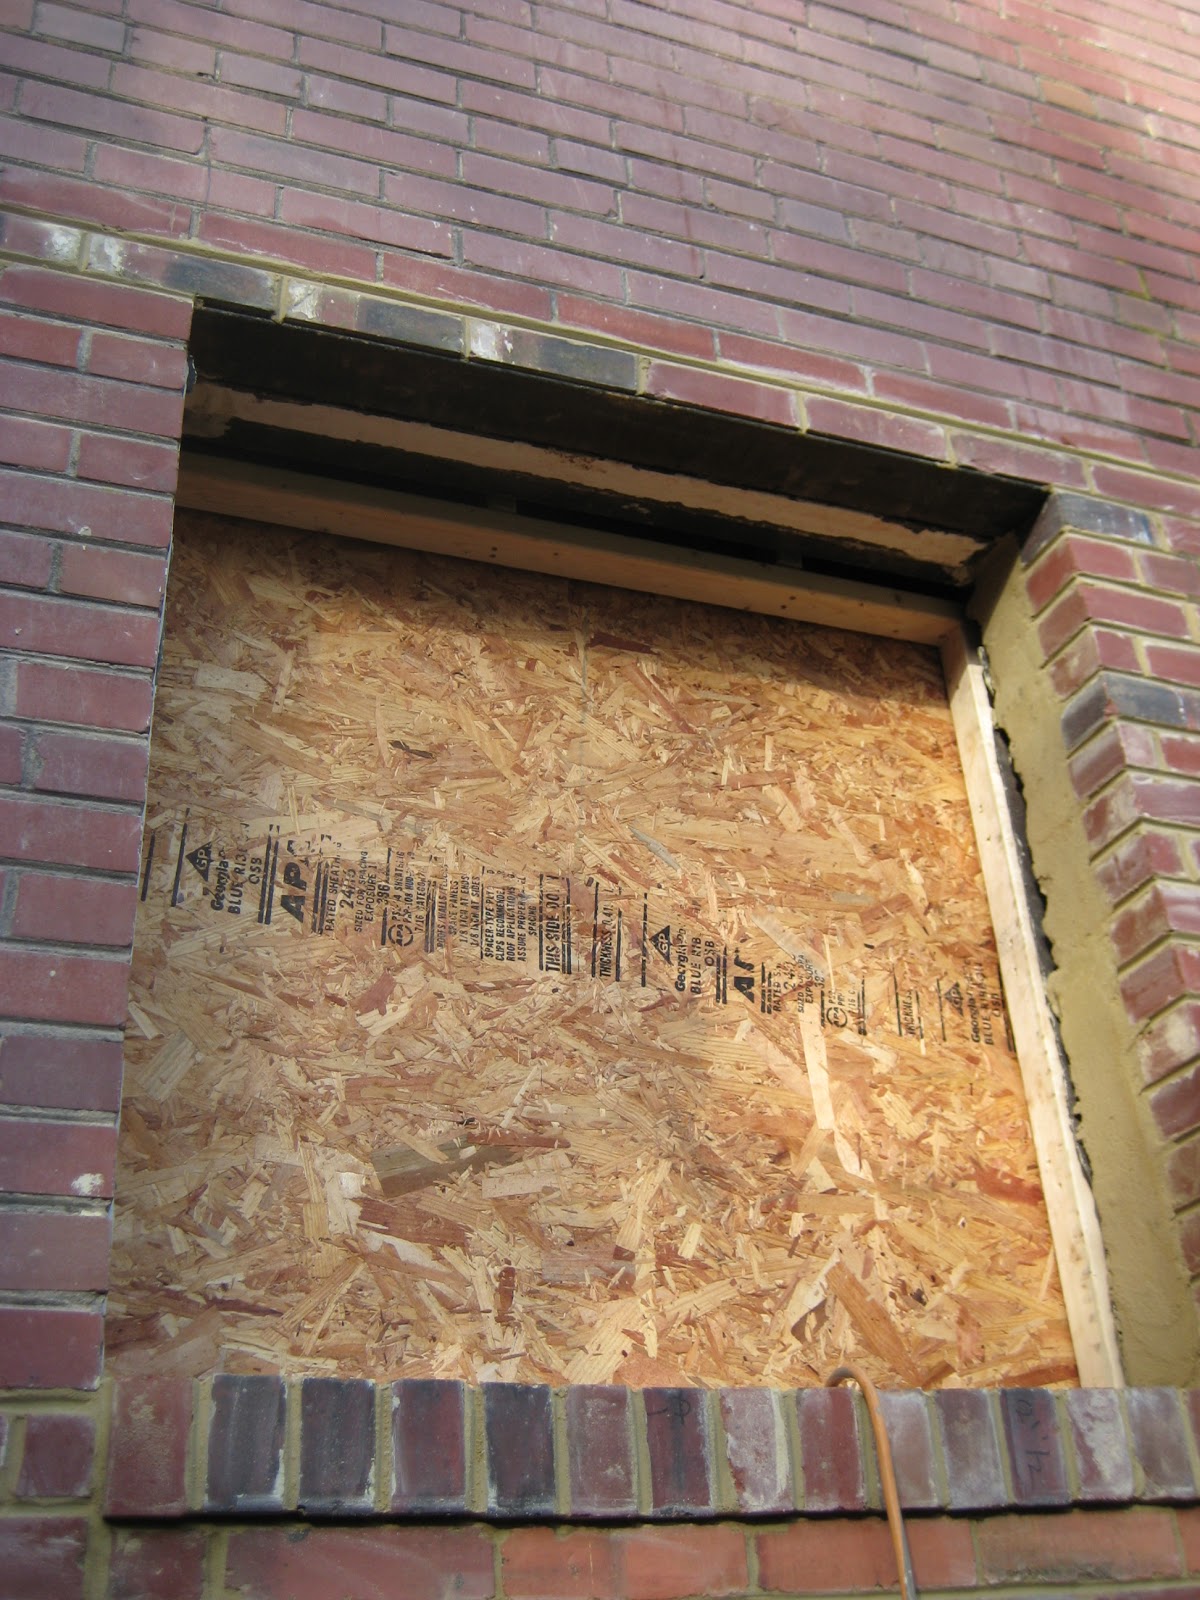
The window cut out for the kitchen window. This is roughly twice the width of the old window to let more light into the much larger kitchen.

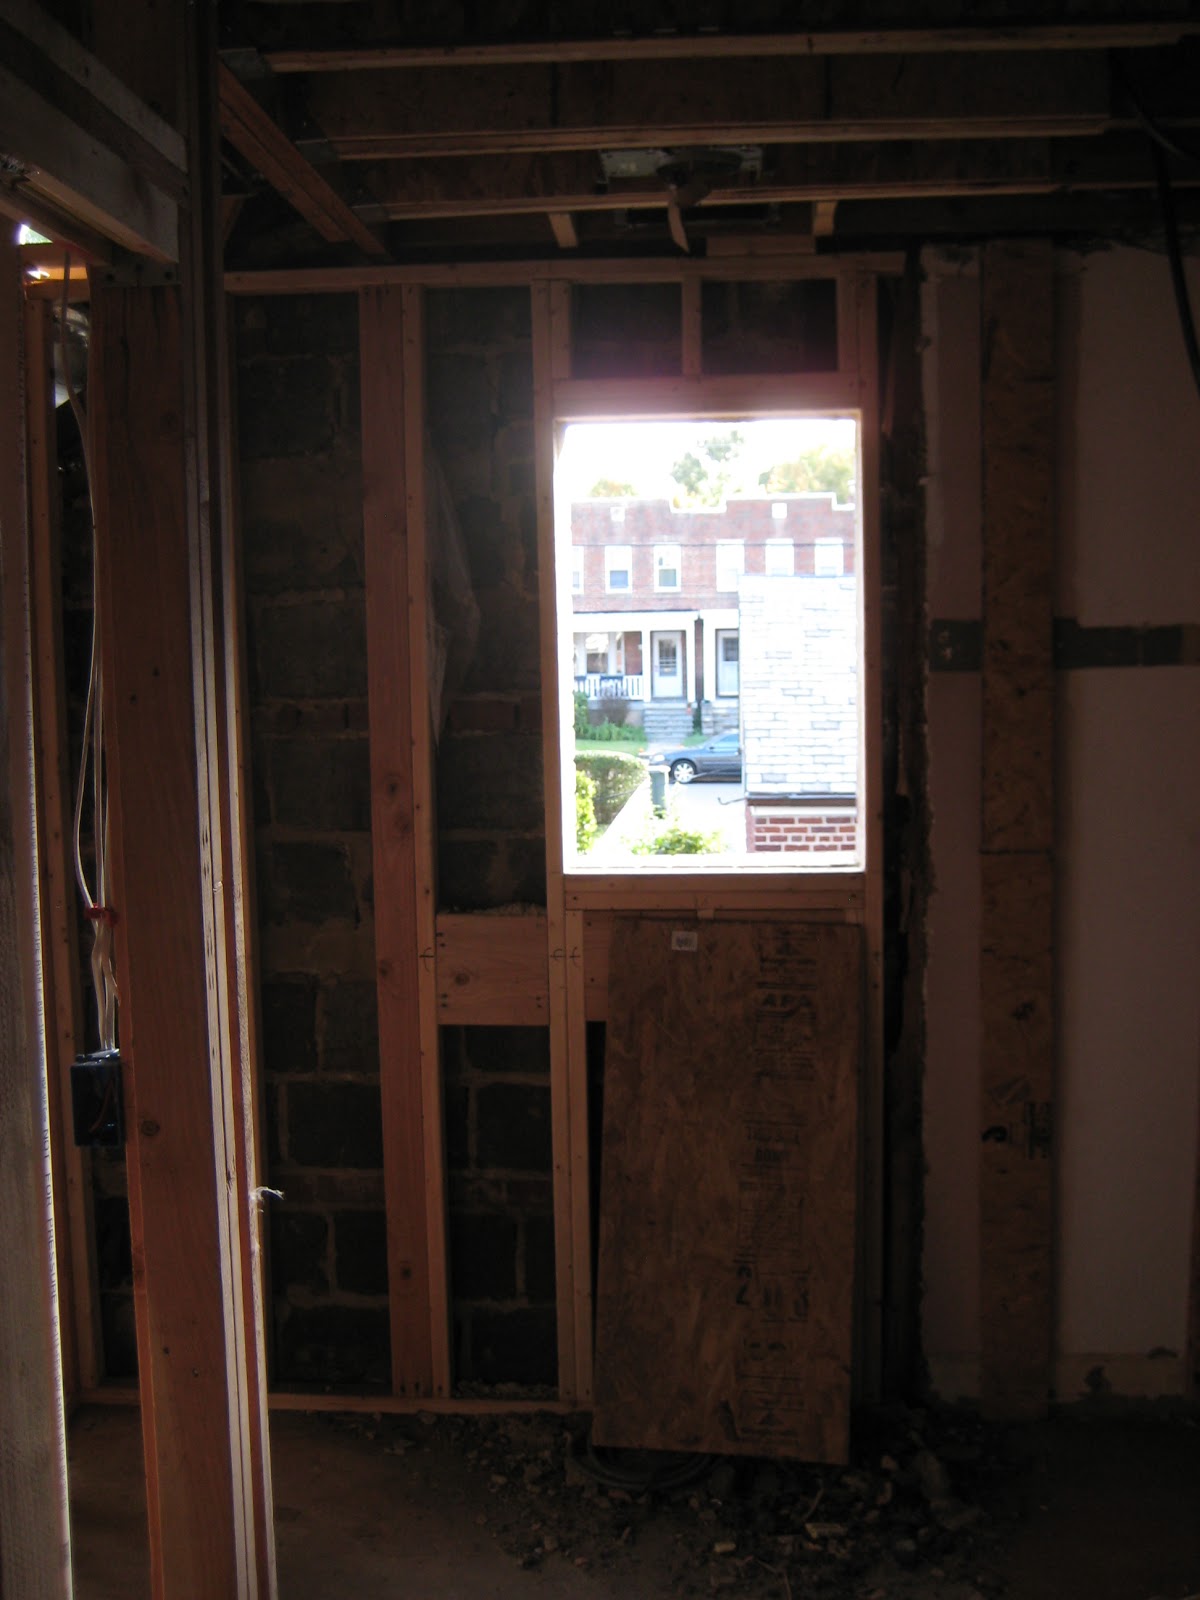
Here is the other window opening that we had cut for the house - this one is in the hall bathroom (the one that used to be the only bathroom). Since we took away the window that was there (because that's where we put the addition) we needed to get some light into the space.


Here is the view out of the window. It is actually a pretty nice view.

Something I noticed while looking around on the front porch. You can actually see all the way through the house. This view would be would be through the porch window, through the dining room and living room and out the back window

Wednesday, October 20, 2010

Days 63-75 Plumbing electrical and HVAC

Hello again all, sorry for the big delay. Things continue to be completely crazy here. Monica was out in LA all last week so I didn't have time to go over to the house to take more pics or update the blog. My respect for single parents grows every day...

So on to the pictures!


Hyo framed out the arches over the entry way. they will be drywalled and will be tall enough to get a 3" crown across the front in the dining room.


In this shot you can see both of them together. Because we cut back the wall on the side of the stairs on the side of the old dining room, the two entry ways are the same depth, so the arches are identical.


Upstairs plumbing in the laundry room. The white box contains the hook ups and the drain line. Because of the easy access tot he roof on the second floor, pretty much everything has its own vent line. It will be nice to have really good flowing drains.


Hall bathroom. The space is wide enough to have a very large vanity with two sinks as well as a space on either side to give the cabinet a more furniture like feel. I think this will be a very nice touch.


To the far left you can see the drain for the toilet. the near drain and supply are for the hall bath tub. The plans have changed a little since you all saw them last. The hall bath will have a door that opens out into the hallway and a small toilet room with a pocket door to the left of the entrance. That was a very good suggestion from Gretchen (thanks!). All we lost was a little space in the hall closet.


Here is a good shot of the toilet room. You can see the frame for the pocket door on the left.


The space for the one medicine cabinet in the wall and the bracing in the walls for the towel bar.


Master bathroom. This is the tub deck for the 5' soaker we picked. (http://bit.ly/dgvpie) It is not a huge tub, but pretty deep and with a very high drain to allow for a deep bath. It is also high enough to see out the window into the back yard (without being high enough to be seen).


Here is the shower stall to the back corner of the tub. This will be all tile with an all glass enclosure.


Another shot of the tub deck and drain.


This is the HVAC unit before they installed it (more shots in its final location in a little bit)


This is the framing around the larger window opening in the kitchen. The window there will be taken out, a larger hole cut int he wall, new structural steel lintel installed and a wider window put in set toward the outside of the opening to leave a deep ledge space.


Plumbing in the butler's pantry. This will be where the sink, wine fridge, and (my favorite) water carbonator/chiller will go.


Other side of the pantry. The thing at the top is the air return for the first floor. The HVAC guy, Erik and Hyo came up with the plan to hide it up above the pantry cabinet so we won't need to have a big metal grate on the wall somewhere on the first floor. Pretty good idea.


Plumbing run in the wall leading into what will be the new dining room. The rain and previous owners caused some damage to the floor in here that was so bad it needed to be torn out. Since we are reflooring the entire upstairs to match up the grain, level and color we have extra flooring to patch this area.


This is the run in the ceiling to the master bath. The line is 3/4" until the split between the tub and shower where it is 1/2". That should provide plenty of pressure tot he two supplies.


Down in the basement, the HVAC is all in as we saw in earlier posts, but there were a few things that I wanted to record before they closed up the walls. This is the supply run through the old window opening in the half bath. You can also see that the wall has been furred out form the existing exterior wall.


They put in the short wall in the peninsula for the basement kitchen. This will contain the drain and supply for the sink and dishwasher.


Here is another view of the supply running from the old house.


On the other side of the supply is the run for the return.


Now way up stairs into the attic - Here is the installed HVAC unit that was wrapped in the old master bedroom earlier in place in the attic.


The black line is the run to the condenser outside. The silver boxes are the supplies and returns for the upstairs.


On the other side of the attic. More runs and returns. As you can see, this ate up quite a bit of space int eh attic for storage. Luckily, the new section of the house has plenty of new space. It isn't quite as tall, but wider and longer. Also, I will build a small deck up here to go over the lines to make the space on top usable for storage.

OK, so next time should be tubs, and finished plumbing, electrical and HVAC and maybe even some doors and windows. Stay tuned!

Saturday, October 2, 2010

Days 45-60

Apologies for the past couple of weeks, but it has been crazy around here. I have been taking pictures of everything at the house, so you won't miss anything, I just need to get the pictures up here and explain what you are seeing. The next few are a lot of shots of framing and walls that are kind of hard to make out, but I will do my best to detail all of the work that has happened over the past couple of weeks.

This first photo is looking back through where the kitchen will be. You can see the red wall of the old dining room in the back. The wall going across there is the divider between the foyer and the kitchen. The back left corner will be the powder room.


Taken from about the same spot as the last photo, but turned to the right. This is the dividing wall between the living room and the dining room (former living room). The big metal post is the structural piece that is holding up the steel beam in the ceiling. The post is sitting on a shorter post that goes down to a cement pier that they put where the basement wall used to be.


This is the dividing wall between the living room and the bonus/breakfast/play room (we have a lot of names for it). The plywood is covering the window and door openings for the back wall (on the left).


This is a shot of where they cut the old back wall of the house. You can see the structure of the old house. It was a mix of cinder blocks and brick and was about 12" thick.


This is the window over the sink in the kitchen that we are going to enlarge. Sorry for the bad photo, the lighting in the house is a bit of a mess with the plywood over the windows to keep the weather (and neighborhood kids) out.


The next few shots are of the "tray ceiling" in the master bedroom. The builder actually suggested this to blend the necessary angled coffer on the east wall of the bedroom. Essentially, there is a short angled section at the top of the east wall that allows for the ceiling to be 9' in the new section and tie into the existing roof in a way that looks OK.


Another view of the tray ceiling framing. There will be a gentle slope up to a square 9' high center - like an upside down tray. Hence the name. Or maybe some guy named Trey invented the style. Either way, it will look really nice.


Hyo roughed in the light fixtures in the house (more on that later). This shot shows one of the four that will be in each corner of the "tray".


Another corner of the framing.

A lot has happened there in the past few weeks. HVAC, plumbing and electrical rough in. I have a lot of catching up to do on the blog!