Wednesday, September 15, 2010

Day 44 - the wall comes down

With the addition structure framed, the only major piece of structural work that is left is the removal of the back wall of the existing house. That was the task that they started yesterday. Since I was not able to get over to the house until today, the progress is pretty stunning. They have removed all of the top floor brick and a good amount of the brick from the first floor. This opened up the space a lot and made for some petty amazing views. The first when you walk in the front door.


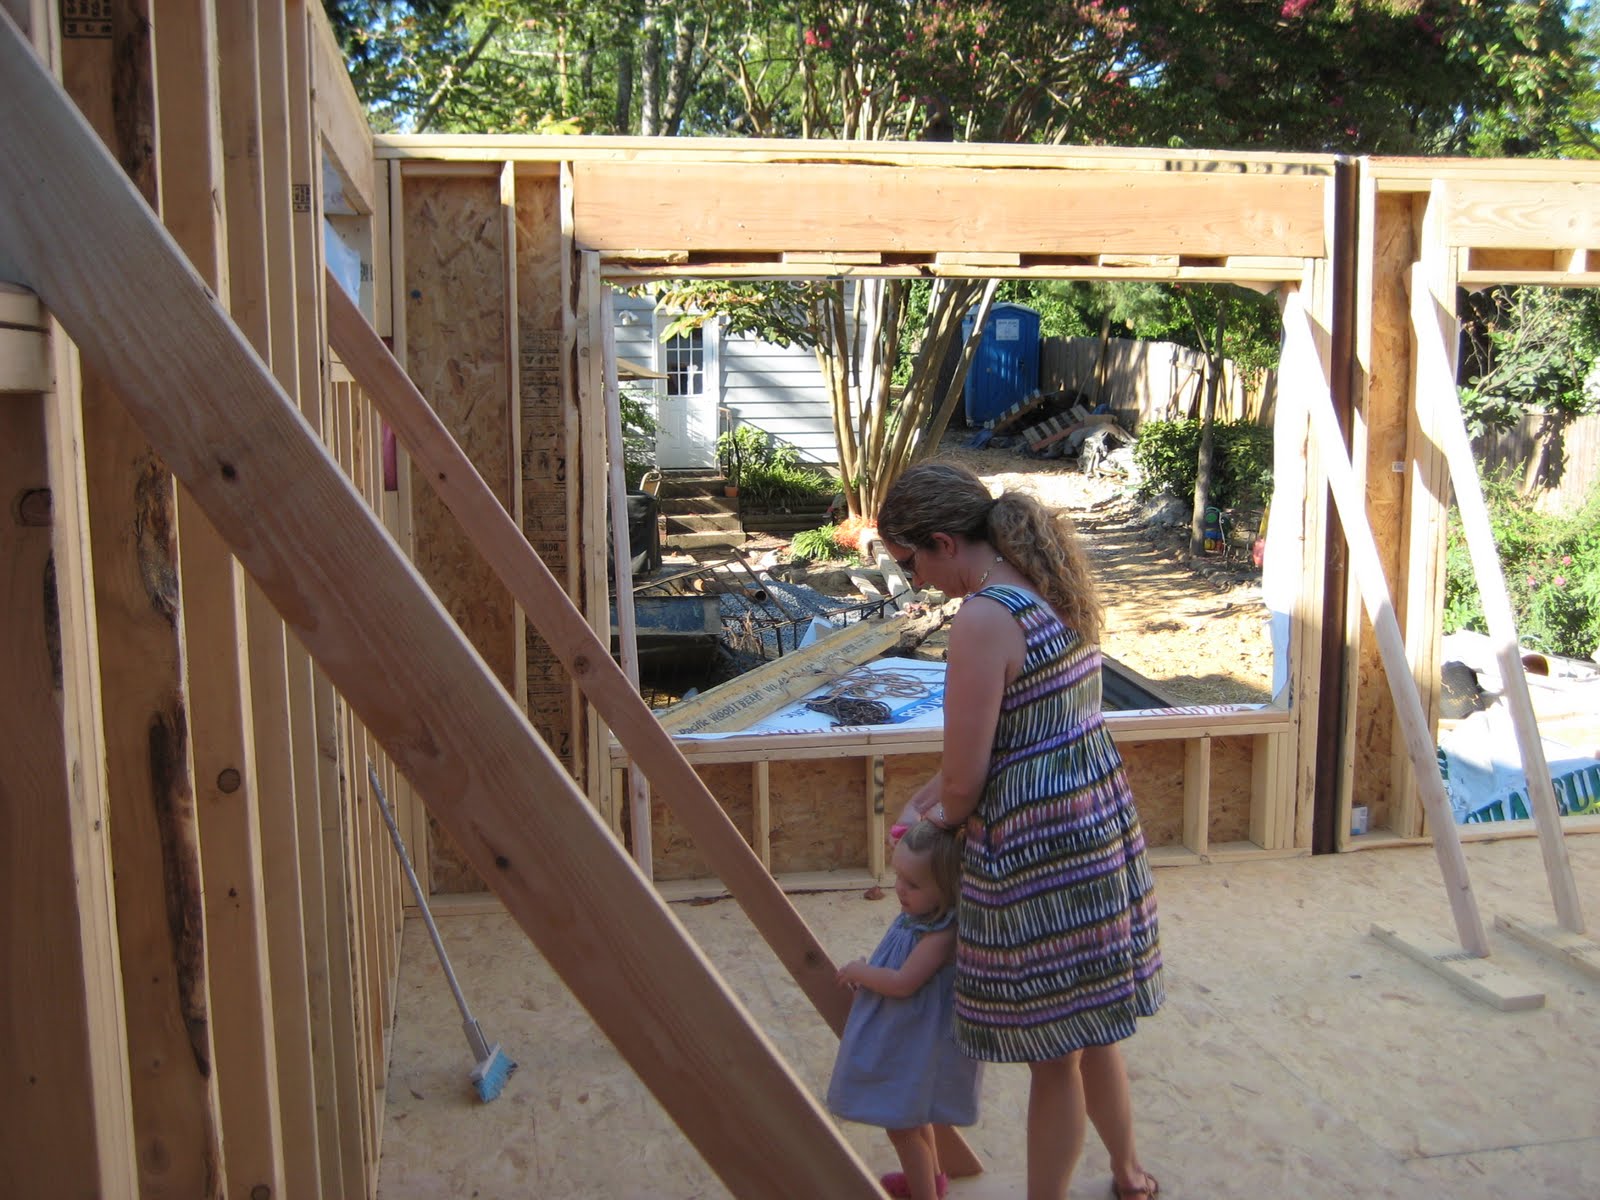
Here is a view right up the stairs when you walk in the front door. The framing you see is all in the addition.

Before we go upstairs, here is the view through what was the living room (to-be dining room) out the back of the house. The flash makes it pretty difficult to make out, but the far wall is the back of the addition. The flash is necessary because the builders are putting up temporary plywood over the window and door openings at the end of the day for security. Much appreciated.

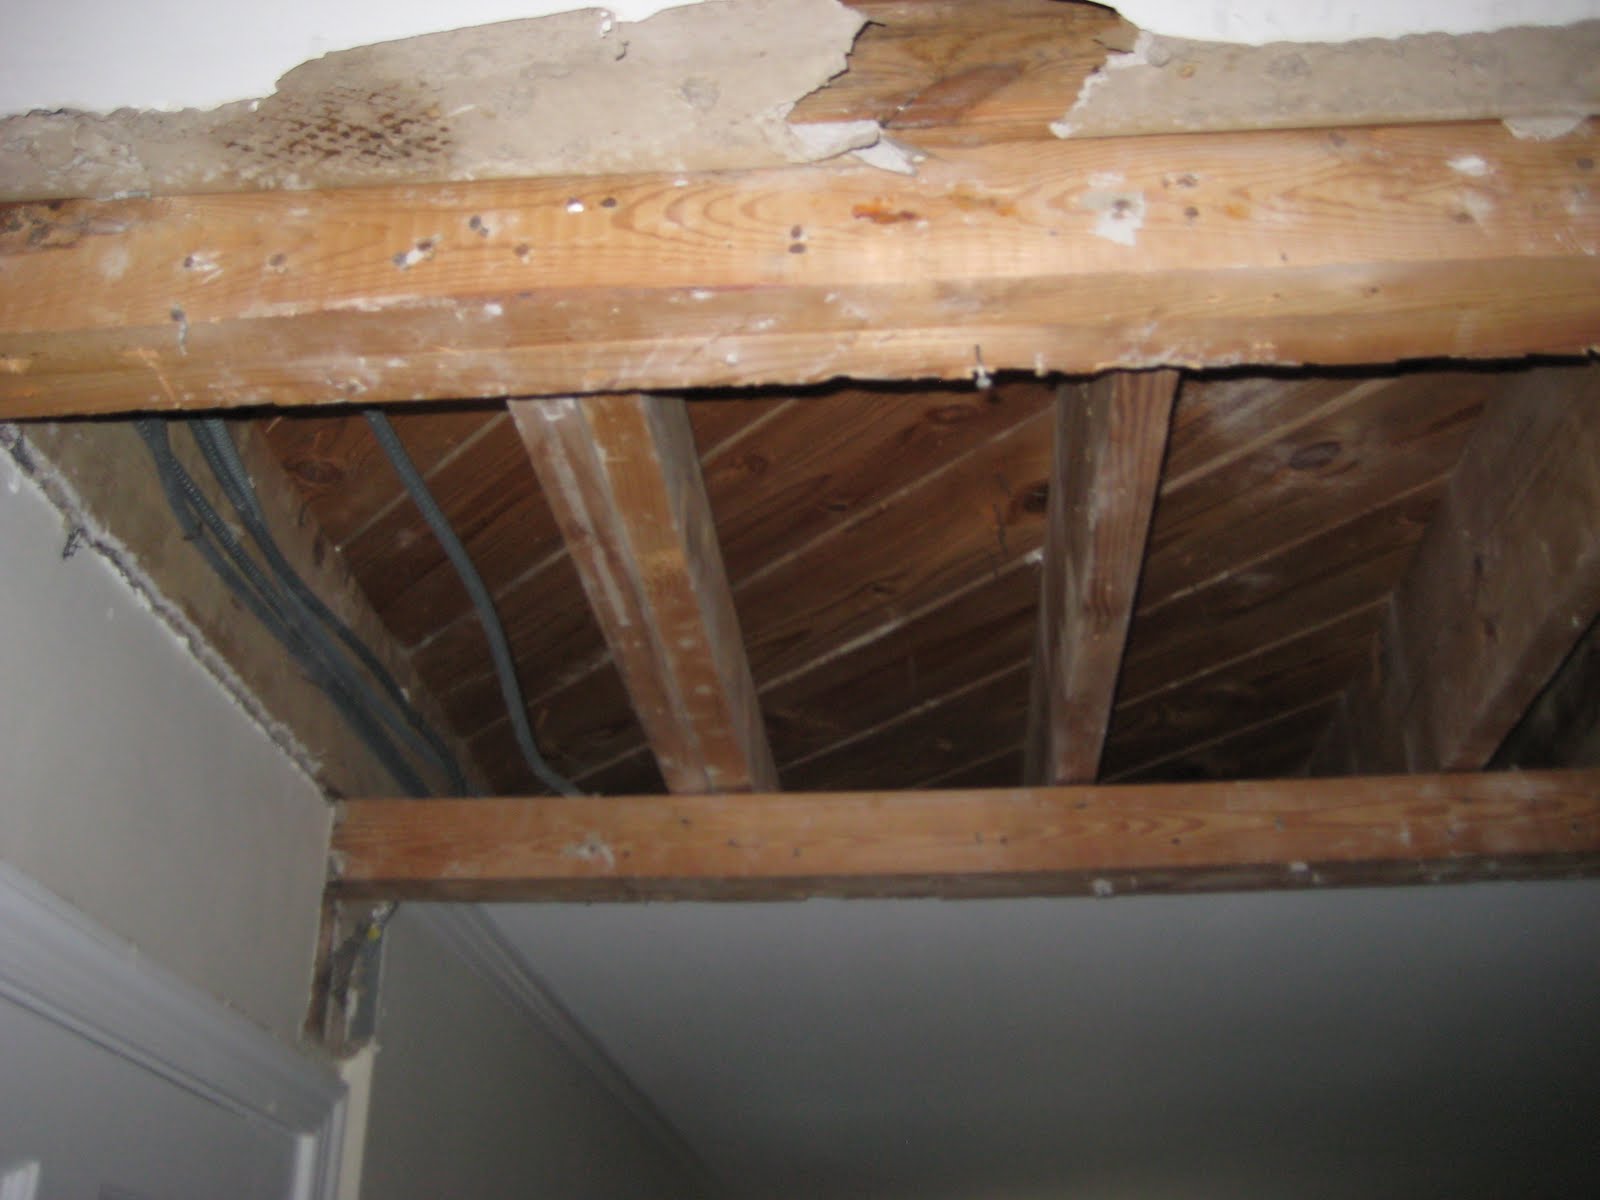
So on to the upstairs. The near wall (with the wires wrapped around it) is just a "cripple wall" meaning that it is temporarily there to hold up the structure of the roof until the real load bearing walls are put in. The larger post just to the right of the wire wrapped stud will remain, It is holding up a pretty serious set of laminated beams that replace the rear wall of the house and run across the entire width.

Here is a view the other way. This shows the master bedroom and the window for Monica's closet. It also shows the exposed existing wall of the house where the bathroom used to be (and will be again).


Here is a view back to the front of the house. the light green wall is the south wall of Abby's old room and the stud wall there is the "cripple wall" I mentioned earlier. The wall to the left will be the division between the hallway leading to the master bedroom (far side of the wall) and my closet and the master bath. The opening is so large to accommodate the pocket door being put in for my closet. This shot is taken from what will be the new location of the shower in the master bath


Here is the view from the other side of the addition. They have removed the entire wall between the old bathroom and the former master bedroom - only the pipes that were in the wall remain. This view shows the extent of the brick wall removal from the second floor. It also shows the difference in the height of the ceiling from the existing house to the addition. The lower ceiling had to be maintained for the depth of the extension of what was Abby's room so that there was not a big change in the ceiling height. The higher ceiling will begin in the master bedroom and my closet. Monica's closet will have a lower ceiling (but it is nearly twice the size, so she still is coming out ahead).

I will be out of town this weekend in New Orleans so I won't be able to update the blog until Monday at the earliest, but there should be all the more progress to report then!

Sunday, September 12, 2010

Days 39 - 42 A new roof!

While I was at the builders auction for the second time (picked up 5 interior doors and 4 sinks) the crew was busy putting the roof on the second floor of the addition. They made really quick work of it and had it up and sheeted in a day.

Where the new roof meets the old roof. The roof, some shingles and the gutter are still up. They just pulled the shingles that they needed to and left the rest intact for now.

I was brave enough to climb out onto the decking this time, so got better up close photos of the layout. Here is the back end of the house. The windows from left to right are: bathroom, master french door and master window.

They did what is referred to as "stick building" to create the roof. As opposed to engineered trusses, this method allows for more flexibility and more space in the attic. The span and size of the roof made the trusses a little over the top, and while cheaper, the lack of attic space for things like the HVAC unit and storage made the decision easy for us to make.

The back yard from the master french door opening. As you can see, there is still a good amount of space left.

Across the back of the house. The window on the left is the main window out of the bedroom and the one straight ahead will be on the north side of the bed.


Back across to the other side. From left to right: second window in guest room, my closet, toilet room in master bath and master bath window.


View toward the neighbor's house through the master bath window.

View from the toilet room window.


View out of my closet window.


View from the second window in the guest room.

The view through the north master bath window.


Her is a close up of the roof trusses and some of the initial rafters. These will be added to by ones that are much closer together but for the time being, these are all that are necessary to hold the roof in place.

A view of how the two walls work. We added a foot of height to the addition to allow for higher ceilings int eh master suite, so these don't line up. We have seen this done other places in the neighborhood and it is pretty common. An easy way to get a little more headroom without adding to the cost very much. I am sure it makes the math harder for the carpenters, but who doesn't like a challenge?

Friday, September 10, 2010

Days 38 Second floor wall framing

This week is really moving fast. I thought I had time to catch up over the weekend but never got a chance to get to the computer, so I am only now finishing up the post from the 10th (I am posting this on the 14th)
The pace continues to be very brisk. The only slow down that we have had so far is the addition of the steel beam that took a while to install, but once that was in, the walls starting going up very quickly.


Here is the view from the street side down the west side of the house. You can see the short windows that will be over the built in book cases in the first floor living room and the addition of the second floor. In order of the windows shown from front to back it goes: second window in the additional space in Abby's room (to be guest room), window in my closet, window in toilet room, window in master bathroom.

A quick note inside: they pulled back the wall in the existing living room to open the space between the kitchen and new dining room.

On to the big stuff... Here is the second floor walls in place. The window on the left is the one in the master bedroom, the middle hole is space for a french door in the master suite and the one to the right is the window over the tub in the bathroom.


Another view from the other side of the yard.

A view straight on to the back of the house. As you can see, the level from the back door to the grade of the back yard is much closer than in the old house. That will really help tie the deck into the backyard.

A view back toward the street down the west side of the house. If it looks like the addition wall is taller than the wall on the existing house, it does so because it is taller. The master suite addition will have taller ceilings than the existing second floor. Not a huge expense and will really make the master suite nice.

West wall from the inside. These were taken out of the window that was in what was Abby's room. There was a huge gap in the floor that they left to be able to tear out the rear wall that made getting out on the second floor deck pretty precarious, so I hope you forgive the photos taken from a place of greater safety.


Straight out the back of the addition.

Across to the east side of the addition. The two windows on the left are on either side of the bed and the one on the right will be in Monica's closet.

Thursday, September 9, 2010

Day 35-37 Second floor framing

Apologies for the delay in updates, there has been lots of progress, so much so, that it has been hard to keep up with documenting it.

They continued to do some more demolition in the house and removed the tub and floor in the bathroom. The floor was so heavy that the joists had to be cantilevered when the bathroom was being put in. So removing it means that the joists also have to be replaced.


Sorry for the bad light, but this is the view of where the bathtub used to be.


Another view a little father back


This stack of lumber will be the new walls in the small bedroom and bathroom.


The ceiling was also torn back from where the roof is going to be removed.

A view out of the second floor window onto the new second floor decking.


They removed the small detail over the front door and the soffit on the other side of the entryway so that when they pull the wall back in the entry foyer the two sides will match.

Hyo is going to put in two gentle arches on either side of the stairway entrance. It should really open the space up nicely.

That door is the one to the basement. This will be the opening between the dining room and the kitchen.

The second floor going up really helps you visualize what the space is going to look like.

The small wall on the left of the door opening will be the  separating wall between the breakfast room and the living room.

A view straight out the window in the breakfast room.


Across the back of the addition.

This is the support post that will be embedded in the wall that supports the steel beam for the second floor.

Here is a view of the steel post and beam.

The steal beam and how it is tied into the rafters.

The other side of the steel beam.

Down to the basement... This is the space for the washer and dryer.

The basement bedroom.

The closet opening in the bedroom.

The basement living room space.

Here is the sump pump which will be in the bottom of the coat closet.

Tuesday, September 7, 2010

Days 33-36 - First floor framing

After a great time with family, we are back from labor day weekend in St. Petersburg and wanted to check on the progress of the project while we were away. They continue to make a lot of progress and things are going up pretty quickly.


Here are Abby and I looking around the new first floor.


Abby is a big fan of the new living room. This is probably the first of a lot of play times in this room.


Back toward the east side. the two window openings will be in a breakfast area divided from the main living room.

A view to the north through the new living room to the back yard. The large opening in the middle is the space for the french doors leading out to the deck.


Monica and Abby in the living room. The opening in the background will be filled with a large three-panel window, We wanted to maximize the glass on the back of the house to look onto the back yard.


Across the back of the house.


Another angle through the back of the addition. Abby loved looking around. It will be great to have more space for her to run around.


View along the east wall.


View through what will be the breakfast area.


A view straight on from the back of the yard. Monica and I were very happy with the amount of yard we will still have. It ended up not being nearly as small as we had feared.


Believe it or not, this is the view from the cherry stump. I may need to move vantage points as I am not going to be able to fit much more in future pictures.


A view along the west side of the addition. You can see the long short windows that will be over the built in bookcases in the living room.